In warmer weather I like to grill. That grilled taste helps the taste buds and the mental.
Grilled Rib Racks
I invested in a gas grill for a quicker process. Am I a professional griller? No. Have I figured out how to do it though? Yes. Have I burnt some meat? Yes. But I kept at it and I am able to grill when I get a craving.
I always buy Smithfield Extra Meaty pork back ribs as they are the only brand locally I can find that states they are gluten free. I usually buy two racks and season them differently to have options. I like options.
The day I plan to grill I set out my ribs for a few hours to bring to room temperature in their packaging. When I’m ready to make them, I will lay out aluminum foil pieces the size of my rib racks. Then I open and rinse under cold water. In my mind this rids the meat of any funk I do not want and also helps the seasoning to stick and penetrate. I set my rinsed ribs on the laid out foil.
Now for this next part you can do this or not. I enjoy either way but some say you don’t know how to grill ribs if you don’t.

Instructions
-
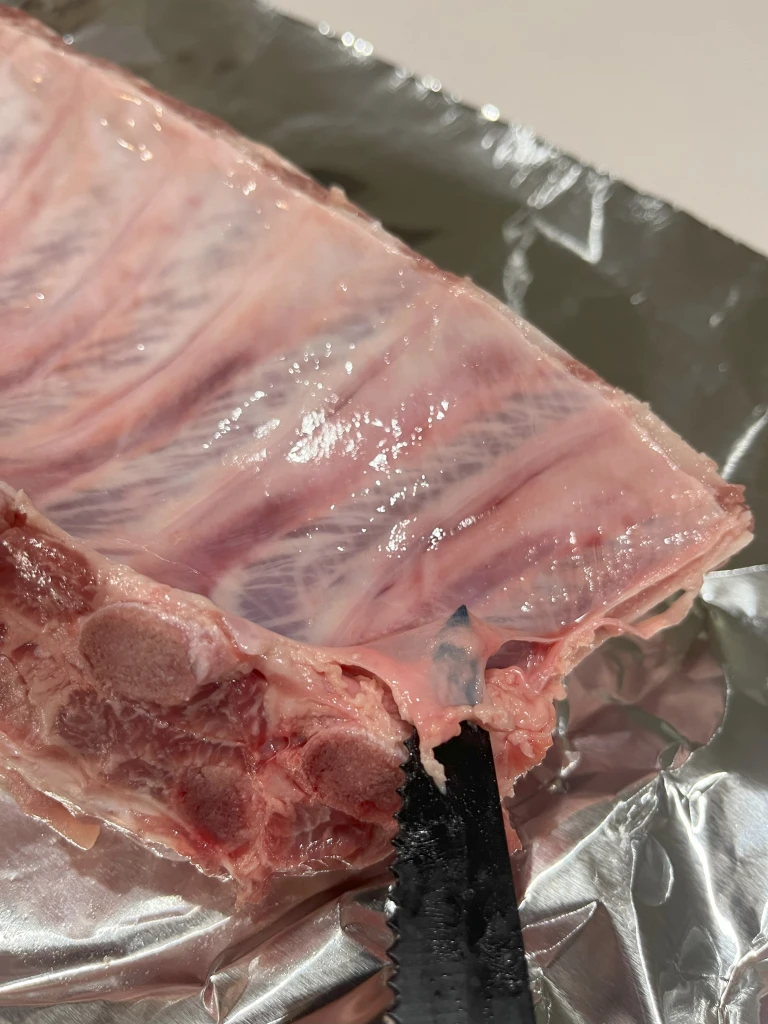
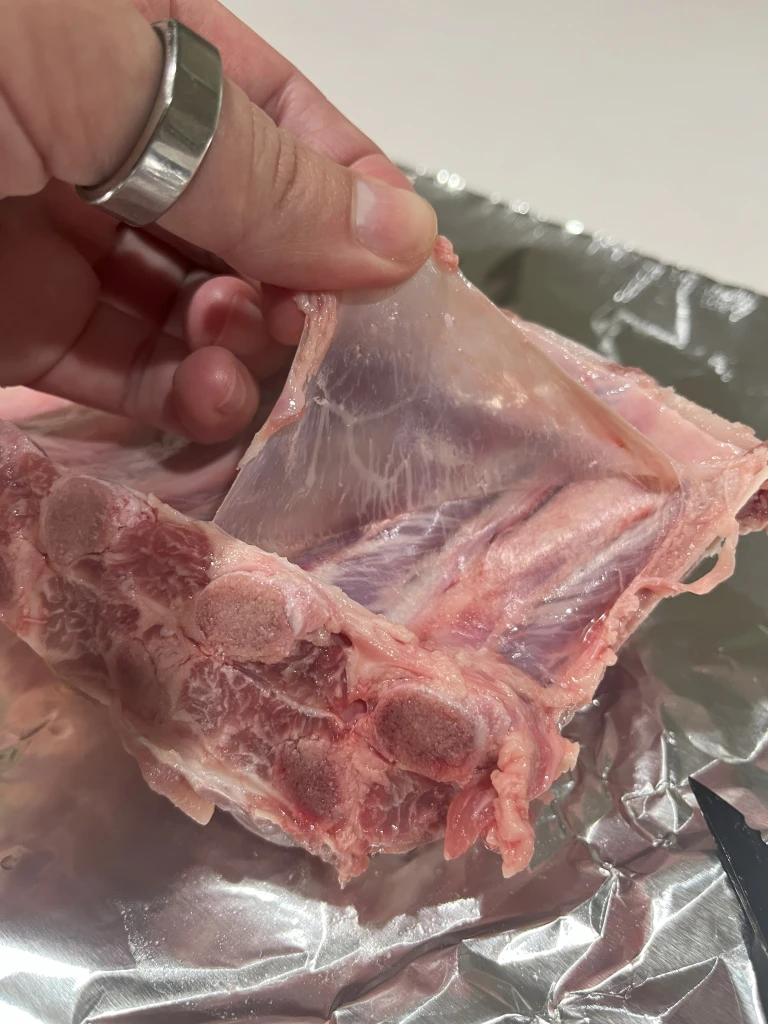
Take a knife and remove the thin layer of membrane on the underside of your racks. I will find the corner and carefully pinch with my fingers while I get a knife under the membrane to loosen. Try to get the point of your knife under and pull up with the hand you are pinching with.
-
Keep pulling up and along the length of your ribs until the membrane is removed. Most times I get it off with one pull and swoop.
-
Now for the seasoning. I do not have a recipe or seasoning amounts but below are the different seasoning mixtures I have tried and liked. When using salt or a seasoning with salt, I always sprinkle that first again to help penetrate the meat. I start with the underside of the rib then flip and season the top. Once I season a side, I dip my fingertips in a cup of fresh water and rub the seasoning into the meat. If I am using maple syrup or honey, I do not use water. I drizzle the maple or honey last and rub the seasoning in.
Choose your seasoning. Flick and focus.
-
Onion salt, garlic powder, McCormicks All-Purpose Garlic Onion Black Pepper and Sea Salt
-
Real salt, garlic powder, ginger powder, black pepper, maple syrup
-
Onion salt, Real salt, garlic powder, italian seasoning
-
Real salt, onion salt, ginger powder, smoked paprika, black pepper, raw honey
-
Real salt, black pepper, barbeque sauce
-
Real salt, ginger powder, cinnamon powder, garlic powder, black pepper, smoked paprika, raw honey or maple syrup
-
Countless of options depending on your preference and tolerance – you see I’m always throwing ginger in there – helps me with digestion
-
Then I heat my grill to 300 degrees. I’ve used Weber gas grills and cheap o’s from Walmart. It really doesn’t matter the brand. If you get your grill to stay around 300 degrees, you’ll be good.
-
I lay my racks bone side down first and cook for 30 minutes. I like to stay near the grill during the first few minutes to ensure the temp steadies at 300 degrees. If it gets too much hotter the outer meat may burn before the inside cooks. If this happens, I open the lid for a few seconds to cool.
-
After 30 minutes, I flip and grill for another 25-35 minutes. The timing depends on the size of my ribs. I check on my ribs a few times to ensure the top isn’t burning, especially if I’m using honey or sauce.
-
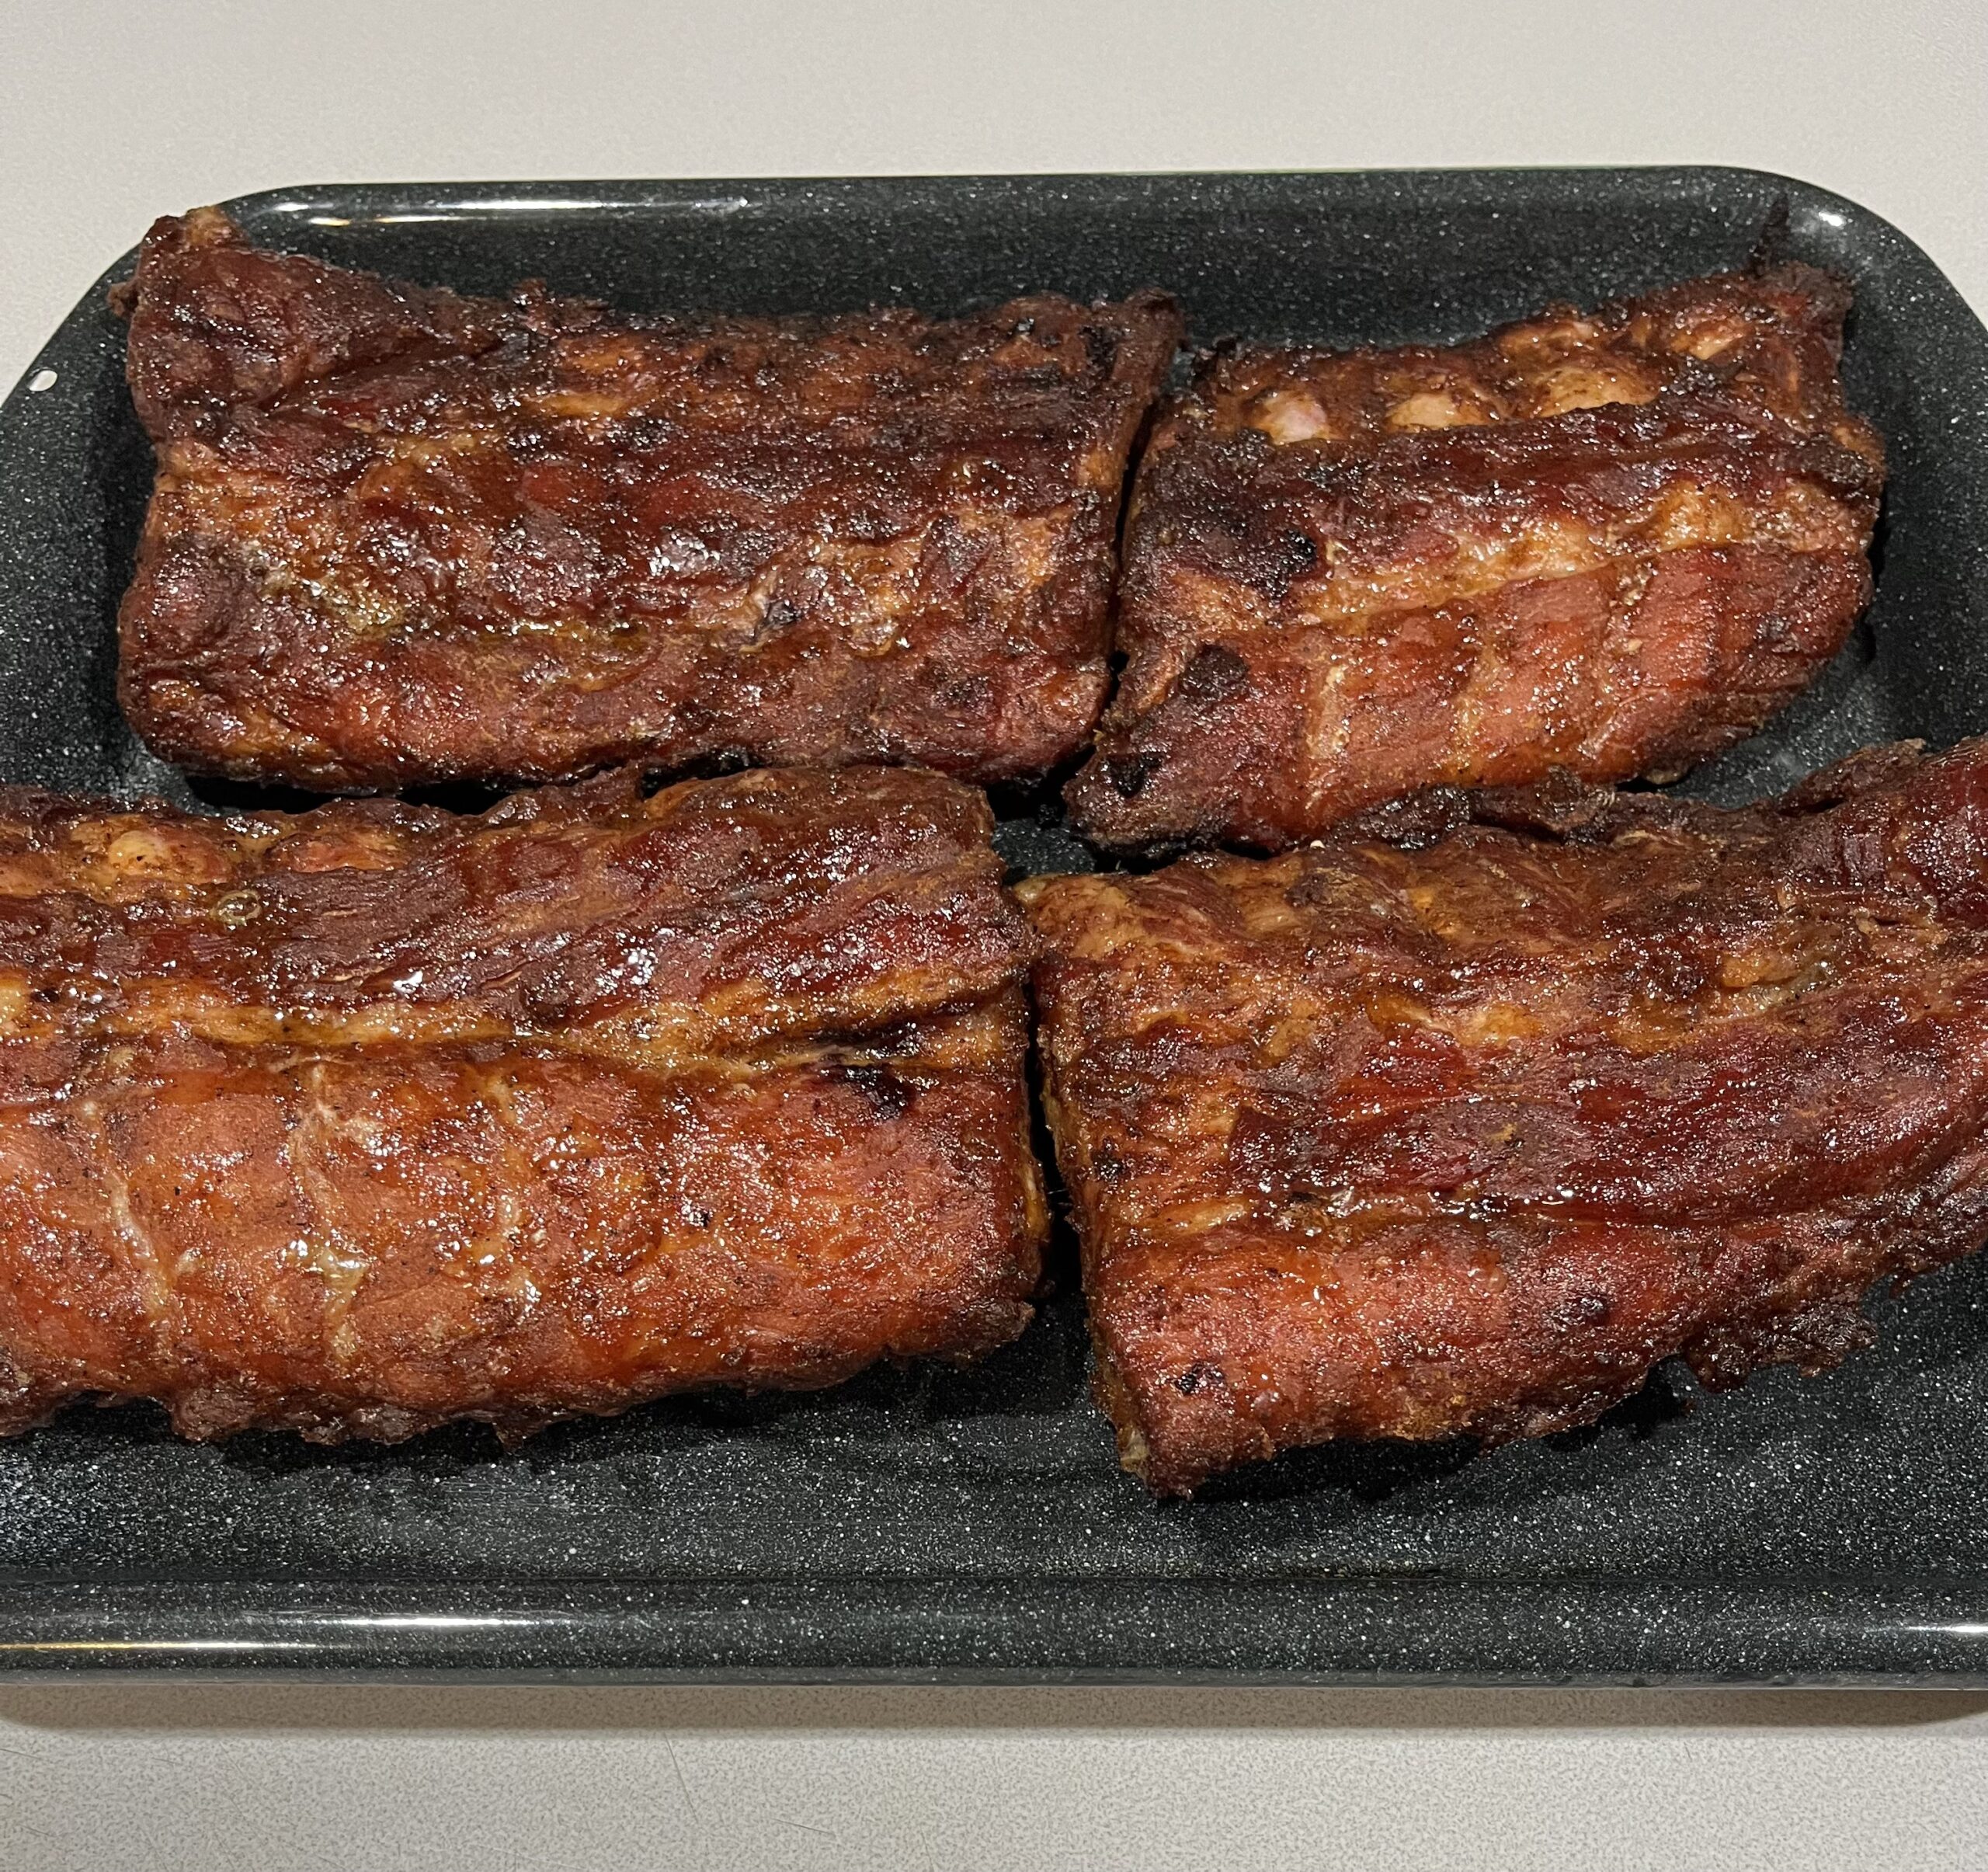
Once my ribs are thoroughly cooked, I remove from grill, allow to rest a bit then slice up.
-
Honestly my sides are usually a type of vegetable or I just eat alone. Freshly sliced cucumbers or celery sticks are great. Or sometimes I make up green beans or asparagus.